How to LS-swap your classic in one day
People love getting on the Internet and telling everyone how easy it is to LS swap a classic car, while a chorus of booger-eating naysayers will tell them it is never as simple as the LS fans make out. I’ve done quite a few LS swaps and you can absolutely LS swap your classic Holden (or A-body GM ride) in just a few short days and without spending a King’s Ransom.
Way back in 2016 two mates and I proved you could easily get an LS into your car and fired up in less than a day, even if it wasn’t quite ready to go throw big skids. Here’s how we did it.

This ‘74 Holden One Tonner was bought brand new by my mate Scotty Barter’s dad, and it’s had a few upgrades over the years, including hand-me-down engines from Scotty’s Sandman panel van, a front-end swap off an HQ Statesman plus Monaro front guards (fenders), a steel tray, 17-inch wheels, and disc brakes off a 2002 Holden Commodore SS (5.7-litre LS1-powered from factory).
Scotty had a spare LS1 and T56 sitting around in his shed as he’d decided to upgrade his Sandman to a 6.2-litre supercharged LSA, so we figured we’d give it a go to LS-swap Richie’s One Tonner in a day and see if we could get it fired up. We weren’t going to be able to drive it as it was going to need a new tailshaft to suit the fresh 9-inch Scotty had built for it, but we still wanted to test the theory that an 8-hour work day was all you needed to LS-swap a classic.
I had some experienc with this style of project. Working with Mighty Car Mods we took a complete 6-cylinder HQ Holden race car and stuffed it full of 5.7-litre LS1 and T56 6-speed manual, and drove it out of their shed LS-swapped in just 3 days.
The key to our One Day Mission was preparation. From researching far and wide we knew what mounts (Tuff Mounts), what headers (Pacemaker HQ-WB LS conversion long-tubes) and what oil pan (rear hump MAST Motorsports) we’d need to fit to the engine. Scotty bought a spare 5.7L engine loom and stock PCM off Facebook Marketplace and took it to Justin Stark at Ultimate Conversion Wiring to have the security removed from the computer and the loom trimmed down to work in the Tonner.
We also worked out what radiator hoses would work ahead of time, sorted a new clutch, machined flywheel, pilot bearing, shifter, and a fuel system which used a lift pump in the stock tank to pump into a surge tank, then to the engine. Today we’d just fit an aftermarket “MRA” style system to the stock tank which massively simplifies the whole process, but wasn’t available when we did this swap. You could also use an Aeromotive Phantom, or Holley Hydramat.
We knew the tonner was in great mechanical condition apart from the tired old Holden 5L V8, but the suspension and brakes were good so there were no surprises there. We would need to come up with a solution for heater hoses, mounting the ECU somewhere, and for rolling a new custom transimssion tunnel.

Our first step was fitting the flywheel, clutch, spigot bearing, and bolting the transmission to the engine. From there we could get the remote bleeder mounted for the clutch slave, and install the shifter so we could see how much trans tunnel we were chopping out.
We also fitted the engine mounts, and removed the starter motor to make header installation and positioning the engine easier. We really focussed on pushing the engine as far back as possible to give us as much clearance between the thermo fans and water pump.
On this car Scotty used a MAST Motorsport sump, but I have tended to use Moroso gated oil pans as their offer brilliant oil control and are a cost-effective option. Troy Worsley from Warspeed Industries, arguably Australia’s premier LS engine builder, uses the Moroso on all his wet sump combos.
The good thing about swapping an old GM sled is their walk-off front-end. We were able to pull the front of Richie’s Tonner off the chassis with just 15 minute’s work, but this massively simplified the whole project.

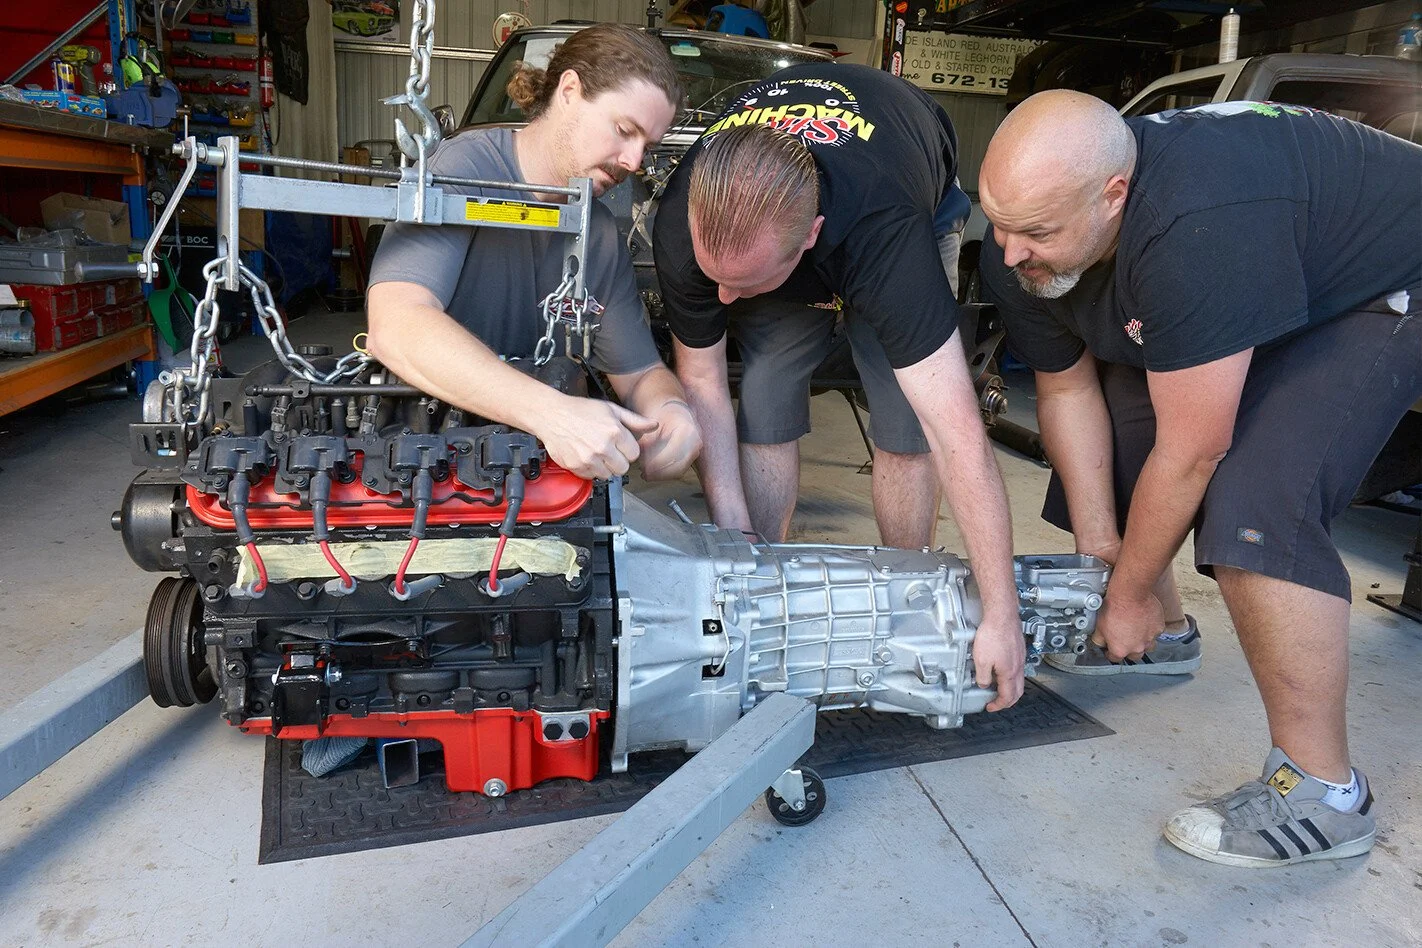
Using the trolley jack to position the back of the transmission made swinging the engine into place so easy it was pretty much ready to bolt to the crossmember before we’d finished our morning coffees.
For all the LS swaps I have done I use mounts from South Australia’s Tuff Mounts. They sell a range of conversion kits, which is what Scotty and Mighty Car Mods both used in their Holden LS swaps, as well as a universal mount kit which I used to LS-swap my 1964 Pontiac Bonneville as A-body parts don’t fit.
Scotty had a spare GM Motorsports Rip Shifter laying around his shed, so he opted to use that on his dad’s car. You can see how much tunnel needed to be removed to fit the T56, and this meant we’d have to get a friend to roll a new fill piece to be welded in place over the top. A bit of trimming of a stock HJ Monaro console was required to cover it all up and this took a few days to sort out which meant we weren’t going to be driving the car as part of the One Day Swap, unfortunately.
While Scotty got the transmission into place and bolted up on the Tuff Mounts conversion crossmember, Fret and I got to work bolting the engine mounts down, running the wiring harness, fitting the headers, and then refitting the starter motor.

For non-power-steering, non-AC set-ups like Richie’s Tonner and the Mighty Car Mods HQ I typically would use a brand new genuine Holden VF Commodore (nee Chevrolet SS) power steering idler so a simpler belt could be used. Today, as Holden has been closed down, there are plenty of aftermarket options available, and Troy from Warspeed Industries does a fantastic, race-proven alternator-only tensioner - CLICK HERE.

The one thing we couldn’t control with this project was Australia’s terrible logistics services. The surge tank and pusher fuel pump designed to deliver the required 58psi of premium unleaded didn’t turn up on time as it had been lost by Australia Post. This meant we didn’t have a way to get the required fuel pressure up to the LS up front and while we tried cobbling together some bush mechanics we weren’t able to start the car, only crank it over.
The good news is we reached that point before 3pm, even when we were stopping to take photos for the story we ran in Street Machine magazine (see HERE). If we’d not stopped for photos and had the surge tank and pump, a pre-made tailshaft, and had a new trans tunnel patch made ahead of time we would have been listening to a rowdy cammed LS boom through headers by lunchtime.

The finishing touches took Scotty another day’s labour on his own, with a day to make a full exhaust that ran all the way out the back of the tray (it is Scotty’s dad’s truck, and Richie doesn’t like it too loud or grumpy), and half day at the tuner’s getting run up on the dyno to make sure the tune was all sweet.
One change which occured after the initial fire-up was a change to a single-plane EFI manifold (see below) for more of a classic look, and the addition of power steering so the car was a bit easier for Scotty’s dad to drive.

Since Scotty got it all buttoned back up again the tonner has been once against driving around like the farm truck it has always been, since it rolled off the dealer’s lot back in ‘73 (see pics below)… well, until Scotty pulled it off the road again to give it a paint job, which led to a huge birthday but we can talk about that another time.
All up this swap wasn’t the most hardcore budget option, but also didn’t tread a Gucci-wrapped path either. Scotty used good quality components so the car would be dead nuts reliable, but didn’t spend the national debt on engineering his dad wasn’t going to use; and this is the key to successfully, and simply, LS-swapping your classic. Find a known recipe, follow it to the letter, and enjoy driving your car.

